| New |
To clear a currently active workspace and prepare CIP RC/PT Girder for a new project, select the New command from the File menu.
Only one project can be open in CIP RC/PT Girder at a time. For many of the commands listed below, if there is already a file with new data open in the workspace, a message box appears and asks if there are any changes to be saved before closing. If you want to save the current project, click the Yes button. When the Save As dialog box appears, select a destination from the Save In field, enter a file name in the File Name field, and click the Save button. If you do not want to save the project, click the No button to open the new file without saving the current project.
|
<Ctrl+N>
|
| Save As |
To save the open project, select the Save command from the File menu. This command is useful for quickly saving intermediate steps during a work session. When the Save As dialog box appears, select a destination from the Save In field, enter the file name in the File Name field, and click the Save button.
To save a project file using a different name, open the Save As dialog box by selecting the Save As command from the File menu. Select the appropriate directory and drive and type the new name in the File Name field. Click the Save button to save the file under the new name. Click the Cancel button to return to the program without saving the file.
|
|
| Revert to Saved |
If you have a project file open and you want to discard all of the data you have entered, you can reload the last saved version of the project by selecting the Revert to Saved command from the File menu. When the following message asks whether you want to discard the changes on the open project and revert to the most recent project file, click the OK button. To keep the changes made to the open project, click the Cancel button to return to the project.
|
|
|
Export to Substructure
|
Transfer the design data from the superstructure program CIP RC/PT Girder to substructure program Substructure.
|
|
|
Save Settings
|
Save the current settings of CIP RC/PT Girder before exit the program.
|
|
|
ProjectWise
|
Provide a number of commands to transfer data between CIP RC/PT Girder and ProjectWise.
|
|
| Print |
To print reports on a project, select the Print command from the File menu to open the Print Report Manager dialog box. Analysis and design reports can only be printed for the selected case.
| Setting | Description |
|---|
| Destination |
Determine whether to print the results to your computer screen, send them to a printer, or print to a text file. |
| Model Reports |
Determine whether to print all of the project's data or only print select portions of the project. |
| Analysis Results |
Determine whether to print the response and/or load elements of a specific stage or for all of the stages. |
| Design/Check Reports |
Determine whether to print a specific design result or all of the results. |
| Miscellaneous Reports |
Determine whether to print the PT elongations, design synopsis, detailed moment capacity, or detailed shear capacity. |
| Create Reports |
Click to create a report based on the selected parameters and print to the selected destination. |
| Enhanced Reports |
Click to create reports in an enhanced HTML format. |
| Printer Selection |
Determine the printer to send the results to. A typical printout contains your company's header including the file name and date. The bottom portion includes the program's name, input file path, design code used, and units selected. Note: Specific beam analysis and/or design check results can only be printed for beams for which a design has been completed and whose results are available.
|
|
<Ctrl+P>
|
| Print Preview |
To view a printout before printing it, select the Print Preview command from the File menu. Information on previewing graphic files and using this screen is available.
Click the Print button to send the output to your printer. Click the Zoom In and Zoom Out buttons to example the output in more detail. When you are finished, click the Close button to return to the program.
Note: The Next Page, Prev Page, and Two Page buttons currently serve no purpose in CIP RC/PT Girder since graphics are limited to one page of output.
|
|
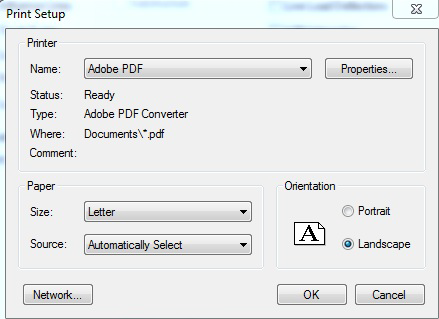
| Print Setup |
To set your printing options, select the Print Setup command from the File menu. When the Print Setup dialog box opens, select the printer you want your results printed to, the paper size, and the orientation of the printout. Click the OK button to accept the changes. Click the Cancel button to discard your changes.
|
|
| Page Setup |
To set your printing options, select the Print Setup command from the File menu. When the Print Setup dialog box opens, select the printer you want your results printed to, the paper size, and the orientation of the printout. Click OK button to accept changes. Click the Cancel button to discard your changes.
|
|
| Send |
To send the current project to someone else via e-mail, select the Send command from the File menu. Select to send the active project through electronic mail. CIP RC/PT Girder will open your computer's e-mail client, open a new message, and attach the project. After selecting the recipient, adding a subject line, and typing a message, send the e-mail using the instructions for your particular system. Note: The recipient must have CIP RC/PT Girder installed on his or her computer in order to view or modify the project.
|
|
|
Security
|
Provide security procedure to protect the design data.
|
|
|
License Management Tool
|
Check out the license information on Bentley products installed on the machine.
|
|
| Exit |
To exit CIP RC/PT Girder, select the Exit command from the File menu. If you have made changes to the project since the last save, a warning message displays and asks if you would like to save the existing data before exiting the program. Click the Yes button to save the data information. Click the Cancel button to return to CIP RC/PT Girder without closing. If you do not want to save the data file and/or its modifications, click the No button to exit the program without saving the project.
|
<Ctrl+E>
|